
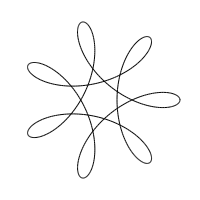
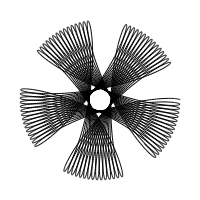
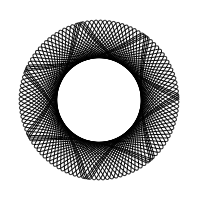
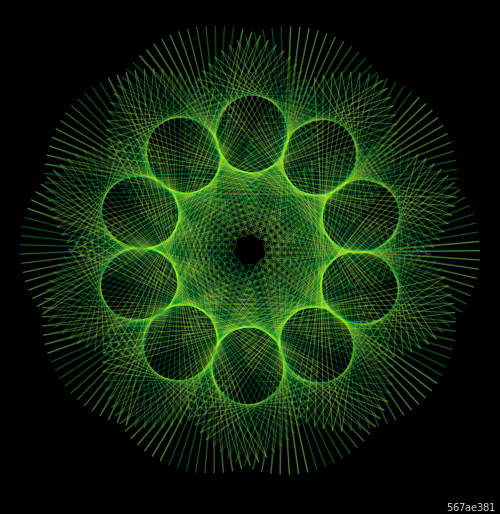
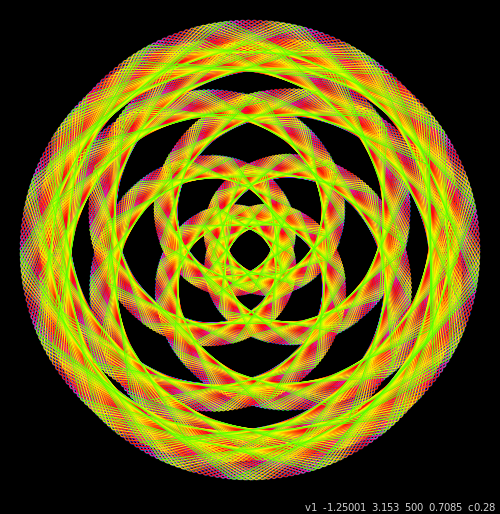
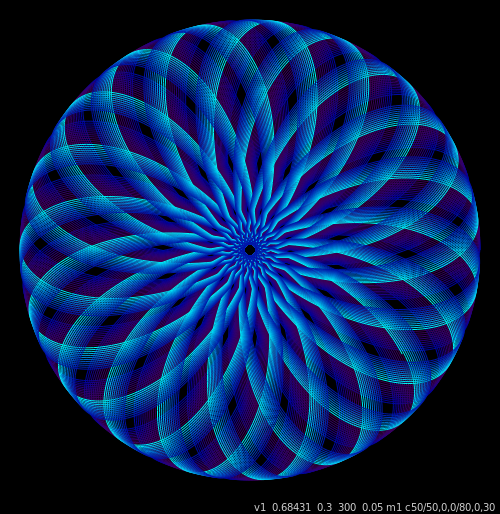
- Gallery of 2021 images;
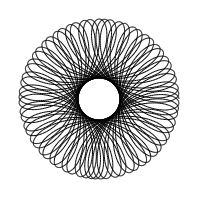
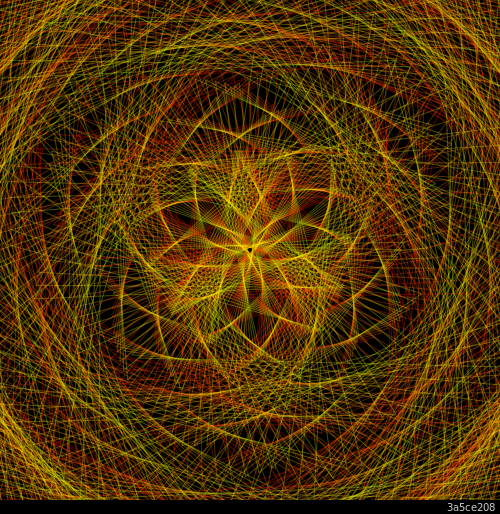
- Gallery of 2005 images
Back in 2005 I amused myself by writing a computer program that produced images like those made by the popular Hasbro, Inc. toy, the Spirograph.
The Spirograph consists of a ring with gear teeth on the inside that you pin to piece of paper and a smaller wheel with gear teeth on the outside the goes inside the bigger ring. You put a pen in a hole in the wheel and as you roll the wheel around the inside of the ring the pen traces out an interweaving spiral pattern. The pattern is varied by using differently sized rings and wheels, and placing the pen in holes that are at different distances from the center of the wheel.
The program, which was written in C, worked fine and generated nice spirograph images. Here are some examples that look very much like those you can make with the actual toy.

Two changes that are feasible with software but not with a physical toy make the results more visually appealing:
- Coloring the line. It starts with one color and gradually changes to a different color at the end.
- Using large step sizes. To simulate the output of a spirograph toy, one normally draws a lot of very short, straight lines to simulate a curved line. I found though that taking large steps and drawing long sraight lines between them produced angular but often attractive patterns that were quite at odds with the smooth soothing curls of the physical spirograph.
Here are some interesting results from applying the changes above:
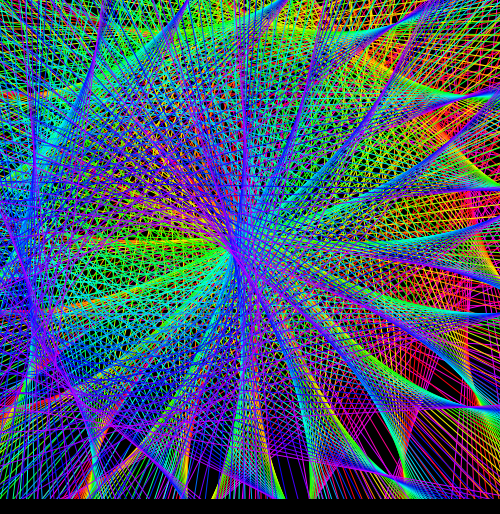
My original 2005 program was written in the C programming language but I really haven't been fluent in C since the 1990's. Since I have been using the Python language frequently for the last decade or so, I decided to rewrite the program in Python using Gtk/Cairo for the graphics.
The Cairo graphics library used in the new version uses anti-aliased lines and, at least to my eyes, produces brighter, more well-defined images with less graininess than the Gnu libplot graphics used in the 2005 C version.
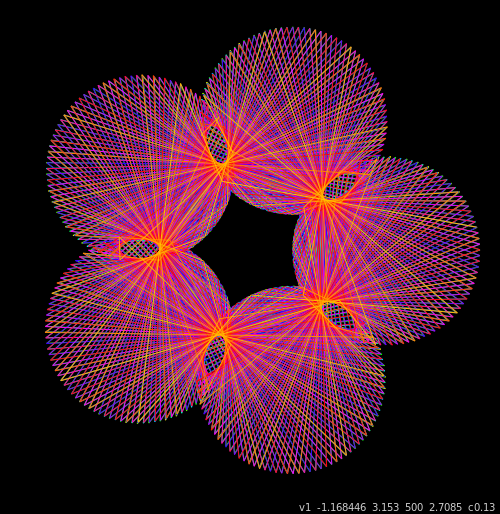
One starts the program with an initial set of parameters on the command line and an image is generated from those parameters. There are four parameters controlling the the geometry of the spirograph line:
- Radius of the inner wheel relative to the ring which always has a radius of 1.0. Unlike a physical spirograph this can be negative in which case a epitrochoid (rather than a hypotrochoid) curve is produced (equivalent to the wheel rolling along the outside of the ring instead of the inside.)
- Location of the drawing pen, measured from the center of the wheel which unlike the physical toy, can be greater than the wheel radius.
- The total number of times to roll the wheel around the ring.
- The step size. The curviness of the spirograph line is simulated by rolling the wheel a tiny amount (measured in 'step size' radians along the ring) and drawing a straight line between the original pen position and the new pen position. When these steps are very small, the result is a lot of very short straight line segments whose directions change a tiny amount from the previous line segment and viewed together form a nice smooth curve. When the step size is large however the line segments are noticably straight with visible angles between each one. This can produce some very nice visual effects.
These are also parameters that control color:
- A color space: either "rgb" or "hsv".
- A color range given by two sets of three numbers. The first set of numbers defines a starting color in the given color space. The second set similarly defines an ending color. One can think of this as a "line" embedded in the color space.
- A starting color value. This is a number between 0 and 1.0 and defines a position between the start and the end on the color line. The first line segment on the spirograph line is assigned this color. We know how many line segments will be drawn (from the total rolls around the ring and the step size) so we interpolate between the ends of the color line, assigning each spirograph line segment the next color value (wrapping around to the begining of the color line when the end is reached) until the last spirograph line segment is assigned the color immediately before the starting color value.
And finally there are:
- Maginification: this allow zooming in on the center portion on the image to eliminate the "disk" effect. The 3rd and 5th images above are examples. It currently only magnifies an area around the origin so it is not very useful on images with a "doughnut hole" but plans are to allow it to zoom in on any arbitrary region.
- There are other assorted values such as image size and background color but the ones above are the ones that affect the final image the most.
Because even small changes to some of the parameters can produce dramatically different images, the process of making art with it is more like exploring and discovering than "making". Consequently it has a feature to repeatedly generate images, making a small change to some parameter (currently only the wheel radius) between each image. This is controlled by entering single letter commands in the terminal window the program was started from and allows generating and presenting new images automatically or stepping forward or backward through then one at a time. One can also save interesting images to a file.
When the incremental change to the parameter is small and the number of line segments not to large too cause an excessively long drawing time, the auto-repeat mode can provide a smooth and interesting animation.
Either the auto-repeat mode or simply stepping through the frames ont at a time allows one to explore a range of parameter values for interesting images much more efficiently than running separate commands.
There are some patterns that are producible by a physical spirograph but not by my program. The toy comes with various size outer rings but my program has only one. This matters because many physical spirograph pictures are produced by overlaying the pattern produced by one ring/wheel combination with another produced by a different combination which requires the outer ring size to be changable. The overlain patterns can also be drawn in different colors, another thing my program doesn't do. Neither of these abilities would require rocket science to add but I have found enough to explore without them and haven't yet felt the motivation.
There are of course a gazallion spirograph generating programs available on the internet, many far more sophisicated that this one. But it's far more fun and educational to generate attractive images with one's own program than to simply download a package from somewhere, at least for me.
Here is a gallery of some of the more interesting images I've discovered using the new Python program: Gallery of 2021 images.
And here is gallery of images (in the form of screen shots) from the original 2005 C program: Gallery of 2005 images. Unfortunately I neglected to write down the parameters used to generate these images so there is no way to reproduce these other than by rediscovering them.